Monday, September 27, 2021

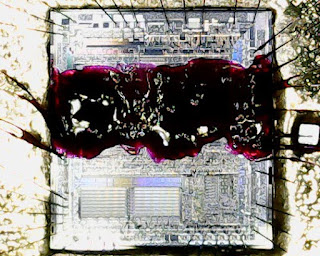
Dragon Breed (Japan) - MCU decapped

Brizzo contacted me, that he has the DB CP-R-B mcu, which is needed for the DRAGON BREED (World) board and as it's on the list of missing MCU's he will ship it to me.

The MCU arrived today. But sadly it was not the needed DB C-PR-B mcu, it was the DB C-PR- which is for the DRAGON BREED (Japan) board and is already decapped since two years. (see here)

So it's really important to check, that the markings on the chip are exactly like on the list of the missing MCU's!

As the chip was here, i decapped it, as it's good practice anyway. The process worked without any problems and within 10mins i had the internal data dumped. It matched the existing dump, which i did in October 2019.


Thanks to Brizzo, for shipping the mcu. Sadly nothing new, but it at least confirms the existing dump to be good!


Sunday, September 19, 2021

Sega Pico Flashcart / Adapter v2

In 2019 i made the first Sega Pico flashcart, which had also the possibility to play games from Sega Megadrive flashcarts.

While this cartridge worked without any problems, i always wanted to make it somehow better in some cases.

With the old design you always could only program 1 game to the eprom or the MD-flashcart. So when the game only used 512kb you had wasted 3,5mb on the 27c322 eprom. You also had to remove the eprom from the cartridge, if you wanted to play the game on the MD-flashcart.

This is all solved with the new design.

There are basically two cartridges now available. The FULL-version, with the MD-flashcart-socket and the REPRO-version, which can only play games from the eprom and has the socket completely removed.

FULL-VERSION

REPRO VERSION

The new cartridges support bank-switching via dip-switches! Which means, you can use the full 4mb of the eprom for games. You can burn eight games with 512kb on it, or four games with 1024kb, or two games with 2048kb or one game with 4096kb. You can even do a mix of all sizes (e.g. 2x512kb + 1x1024kb+1x2048kb) It's all possible now!

Another improvement for the FULL-version is, that you can SELECT if you want to play the games from the EPROM or the games from the MD-flashcart. It's not needed anymore to remove the eprom or the MD-flashcart to play the games from the other option. That way if you burn 8x512kb games on the eprom and 8x512kb games on the MD-flashcart....you will get a fully working 16in1 Multicart with this! The bank-switching also works on the space of the MD-flashcart!

BANK-sizes and BANK-switching are selectable on the cartridge by switches!

Description of the switches


Both carts fit perfectly (with some cutout's) in the original cartridge-cases of the Sega Pico and i really recommend using a original cartridge-case for this flashcart. Otherwise you have to find some other way to fix the pcb inside the Sega Pico to get good contacts between the cartridge and the console.

You will need cutout's for both versions on the back-side of the cartridge-case, for the FULL-version you will also need a cutout on the front-side (for the MD-cartridge-slot). 


Because i know that some people don't like to cut (or like they say "destroy") cartridges-cases i did some 3d-modeling today to get at least solutions for the backside!

With any 3D-printer you can now print yourself the following back-covers for your Sega Pico cartridge-cases:

for the old design, if you already bought one from me

for the new REPRO design


 for the new FULL version

You can download the files for printing here.


As i pretty often get the question "which MD-flashcart is working with the FULL-version":

The easiest way would be the "Flashkit" cartridge from krikzz, with the "FlashKit MD programmer" from him. I'm not sure if he still produces or sell these, but they also get sold on Aliexpress since some months for pretty cheap prices. (Flashkit cartridge for about 4-6EUR and the needed programmer for about 30-45EUR). (Sega Pico games have no SAVE-feature, so you can buy the cheaper Flashkit cartridges, without battery!)

Basically every MD-flashcart will work, which will directly boot into games! I tested some cheap chinese MD-Everdrives, and if you remove the SD-Card from the everdrive, it directly boots into the game in the memory. So if you have a Megadrive, you can load the games to the MD-Everdrive memory and afterwards can use it on the Sega Pico without the SD-card.

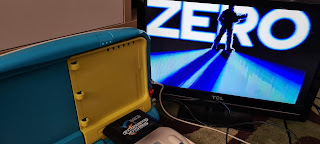
I also saw people who could get Megadrive games to boot on the Sega Pico with the FULL version of this adapter. I tested this with my japanese HPC-0009 model (as it looks like this is only working on the newer Sega Pico models) of the Sega Pico and it's pretty amazing, at least 70% of my tested Megadrive games bootet to the main menue and worked afterwards in the auto-mode (you can't control any MD-game with the Pico), 20% did stop because of the region lock and 10% did nothing...here are some examples:


Pretty amazing to see Mortal Kombat running on a kids console. 

If someone needs a cart, just contact me.

Friday, September 17, 2021

Wonder Planet (Japan) - MCU decapped

 Another mcu got delivered today. It's the 8751 mcu from Wonder Planet (Japan), a game which has the mcu-functions simulated in MAME since march 2001 by Bryan McPhail.

Nearly 20 years later three guys from the DU teamed together and bought the PCB, which included the mcu, for decapping.

Again, decapping the mcu worked without any problems and the mcu-simulation can now get removed from MAME after so many years.

This is the current/updated 8751 MISS-LIST from MAME:
 
DATA EAST:
DH - Side Pocket (Euro - Current is hand crafted)
DK - Shackled
DL00-7 - Last Mission - Need Japanese
DL00-E - Last Mission (World)
DN - Karnov (Japan - Current is hand crafted)
DT-E - Gondomania (Europe - Current is hand crafted)
DY - SR Darwin (Japan)

IREM M72:
AD C-PR-C Air Duel (World, M72 PCB)
MH C-PR-B Battle Chopper (World)
DB C-PR-B Dragon Breed (World)
CC C-PR- Gallop - Armed Police Unit (Japan, M72 PCB)
NS C-PR-B? Ninja Spirit (World) - Japan already dumped
XM C-PR- X-Multiply (Japan, M72 PCB)

SEGA:
315-5163 Space Harrier (was the non "A" ever released?)
317-0011A Dump Matsumoto
317-0098 Wonder Boy III - Monster Lair
317-0100 Tough Turf (need dump of Program ROMs ect)
317-0104 Tough Turf
 
So still some mcu's left. If you want to support the decapping of these mcu's, donations are highly welcomed for buying boards, or paying shipping-costs. paypal: crazy2001@cooltoad.com 


 If i didn't count wrong, this is my 33th successfull decapped 8751 mcu.

Thanks to all people who were involved to get the Wonder Planet mcu decapped!

Wednesday, September 15, 2021

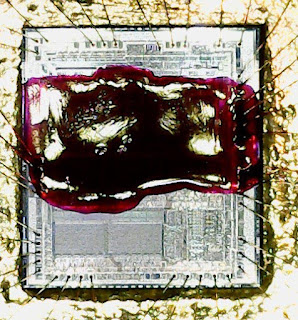
Juuouki (set 7, Japan) (8751 317-0077) - MCU decapped

In a team-effort this board was bought and the undumped MCU got shipped to me for decapping!

The decapping-process went straight forward and after only a couple of minutes i had the 4kb of internal data dumped.


Another game now fully preserved!

Thx to Darksoft, simzy, Gor, Ryan Holtz, iq_132 and Briah Troha for buying the MCU.

Monday, September 13, 2021

Multi Game Hunter - MD & SNES Copier

The Multi Game Hunter (MGH) is a device for the Sega Megadrive and Super Nintendo, which can dump cartridges of both systems to floppy's. Of course it can also load games from floppy's to play it on each console.

Besides some reviews of this copier, there's not very much information about it findable in the web. This blogpost is just an short overview of some (hopefully) useful informations for others, as i bought one of these a couple of days ago and had some troubles getting it working correctly.

I bought an untested unit pretty cheap here in Austria, so chances were very high, that the unit was broken. After i received it, the first thing i did was to plug it into the SNES. The MGH booted into the menue and at first everything looked like it works like it should, but when i tried to dump a cartridge to the floppy...i got an "floppy device error". Same happend on the Megadrive, the menue booted and i even could dump cartridges to the internal RAM and start the games from RAM. But every operation with the floppy did give the same error as on the SNES.

As i was not sure if the floppy-drive itself was dead, i searched for another floppy-drive in my basement. But as my final goal was to change the floppy-drive to an GOTEK-drive (more info on that below) i directly took my spare GOTEK and built that directly inside the MGH.

When the GOTEK was inside i did at least see, that the GOTEK itself did not boot, so the MGH has some problems with power for the floppy-drive.

So my next step was to use my multimeter. After some minutes i had found the problem. The included power-supply (which the seller sent within this package) was wrong!

The MGH need a 9V power-supply, which has the + on the outside!

This power-supply is needed! + on the outside!!

 The seller included a 9V power-supply with the + on the inside...

I changed the power-supply to an correct one (+ outside) and the floppy-drive (GOTEK) did boot correctly. I was pretty happy that the wrong power-supply did not destroy anything inside the MGH.


As there's no information about how to get a GOTEK working inside the MGH i will do an short step by step instruction here about the way i did it:

1. I flashed my GOTEK with the "flashfloppy" firmware, which is pretty amazing! A good youtube-instruction of how to do this is here.

2. I did add an OLED display to my GOTEK, which makes the use of it so much better. A wire-diagram can be found here.

3. To get the GOTEK working inside the MGH you need to set the S0-Jumper on the GOTEK!


4. Now you can built-in the GOTEK inside the MGH. (I have the grey MGH and the grey GOTEK looks pretty good inside!)


5. Format an USB-stick to FAT32.

6. For creating IMG files, i always use WinImage.

7.1. First test was to dump a cartridge to the GOTEK-FloppyImage. Create an empty 1.44mb image with WinImage and save it to the USB-stick as EMPTY.IMA image.


 7.2. Rename the EMPTY.IMA to EMPTY.IMG (rename extension to IMG)

7.3. Insert the USB-stick to the GOTEK, select the EMPTY image on the GOTEK-screen.

7.4. Insert an original game-cartridge (game-size should be 512kb or 1024kb) into the MGH and dump it to the floppy-disc. (Worked without any problems on my test-case)

7.5. Afterwards you can try to run the dumped file from the "floppy"...which should also work!

8.1. My second test was to get existing dumps (No-Intro) working on the MGH. Download some roms somewhere!

8.2. You will need ucon64 for it. Download this program and extract the files to a directory on your pc.

8.3. Copy your roms in the ucon64 directory.

8.4. Your roms have get converted to the "Multi Game Doctor 2/MGD2/RAW"-format. To do this you will need the following command: ucon64 --mgd "Sonic The Hedgehog (World).md" (where Sonic The Hedgehog (World).md is your rom-file) this will generate a new file in the same directory called something like "MD8SON0.008". (For SNES roms..it will be SF****.008)

8.5. Now we need to add this new file inside a floppy-image. Open WinImage => NEW Image => 1.44mb => drag & drop the "MD8SON0.008" inside the WinImage window. Save the Image as *.ima File on your USB-stick. Don't forget to rename the *.ima to *.img! (I always save the IMA files with the same name, as the original No-Intro romname is...this will give you a pretty good romlist on the GOTEK for game-(floppy-)selection)


8.6. Now you can insert the USB-stick to your GOTEK, select the new generated floppy-image on the GOTEK and try to run the game from the floppy on your MGH! This worked pretty amazing in all my cases. Loading a 1mb romfile, takes about 45seconds.


The MGH with the new GOTEK-drive is pretty amazing...for sure it's not as good as an Everdrive for playing games these days....but if you remember that these devices are over 26years old...this is still pretty good working even today. And don't forget, you can even dump your carts (SNES and MD) with this device, something you can't do with your Everdrive.


Maybe this is useful for someone. My project with the MGH is at least finished...i will now play some more games with it ;-)

Monday, August 30, 2021

BPROM Adapter (14 in 1)

This blog is dedicated to my hobby "documenting, dumping, decapping, preserving games and all kind of software and constributing all this to MAME and other community's. Emulation got my attention in 1998 and while i used MAME since 2001 for playing the good old Arcade-Games, it took 7 years more until i started to constribute to MAME. 

Starting with an cheap WILLEM programmer, i only could dump the standard eprom's at the beginning. Even until 2011 and while i already had dumped many undumped and new games, i always had to ship the BPROM's via post-mail to f205v in Italy for dumping it. All changed, when i bought myself an expensive GALEP5 programmer and asked CONITEC (the company which produces this little monster) if they can add support (reading and writing) for BPROM's. => which they did! (for free!)

So for reading BPROM's these days, you have most likely only two choices:

1. Buy an modern extremely expensive programmer! (400EUR+)

2. Buy an very old programmer, which is in most cases also expensive today and even hard to get running these days on modern computer-systems.


So dumping Bi-polar PROM's (BPROM's) is in most cases nothing you can do with your average programmer. And that's also, why many external constributions to MAME are missing the dumps of the BPROM's.

My goal of this project is to make simple tools/adapters so anybody can dump even extremely rare chips with an cheap programmer.


While you can find single BPROM-Adapters on the web, there was no All-In-One-Solution so far.

I designed this 14-in-1 Adapter-Package to fit in the 10x10cm PCB-Production. It's cheap and easy for selfsoldering.

The adapter support's READING the following BPROM's and even the 2708 EPROM:

  • 82S123 (32 byte)
  • 82S129 (256 byte)
  • 82S131 (512 byte)
  • 82S135 (256 byte)
  • 82S137 (1 kbyte)
  • 82S141 (512 byte)
  • 82S147 (512 byte)
  • 82S181 (1 kbyte)
  • 82S185 (2 kbyte)
  • 82S191 (2 kbyte)
  • 82S195 (4 kbyte)
  • 82S321 (4 kbyte)
  • 82S641 (8 kbyte)
  •  2708 (1 kbyte)

Of course it also supports the equivalent BPROM's from other company's like the 24S10 or 74S287 for the 82S129.


 All BPROM's can get read as 2716 or 2732 (see the markings on the adapters) which should be supported by any programmer.

For reading 2708 eproms, you will need an external power-supply, which get's the needed +12V and -5V...just connect it to the adapter and read it as 2716.


Reading the BPROM's as 2716 will give you a 2kb file. Split the file to the correct sizes of the BPROM (The size of the BPROM is written above at the list of supported BPROM's) and you will get your correct dump of the bprom! (example 82s123: Split the 2kb file in pieces of 32byte each. All pieces should have the same CRC. Enjoy your BPROM-dump!)

If your programmer supports a "PIN-Check" before dumping you can have "1 Missing Pin" on some of the BPROM's. That's OK, don't worry ;-) !


Needed parts:

  • 7 pcs 40 Pin 1x40 Male 2.54 Breakable Pin Header

  • 3 pcs 1P2T Toggle Switch


  • 2 pcs DIP16 IC Socket
  • 1 pcs DIP18 IC Socket
  • 3 pcs DIP20 IC Socket
  • 2 pcs DIP24 IC Socket
  • 1 pcs DIP24 IC Socket (wide)


  • PCB Files: You can order the boards here.

Saturday, August 28, 2021

Casio PV-1000 & PV-2000 - new Controllers

 Getting a controller for the PV-1000 (or PV-2000) is nearly impossible these days! So if you got a console without a controller or want a second controller for two-player-games you have to search for a very long time and most likely have to pay high prices if you find one for sale.

As i wanted to get a second controller for my console since some years, and never found one for sale, i made my own one!


Yes, this is a PV-1000 (and PV-2000) controller inside a NES-Case! The internal design is completely new and reverse engineered from the original controller with a nice black MiniDin8 cable! I even included the MAIN/ATTACK switch, with you can swap the functions of the button's A and B on the controller! The cables have a length of ~1m, which is exactly the same as the original controllers have.


Playing the games with this controller is really a new experience! To be true, they play better with this new controller as with the original "Joystick-Controller".

As the controllers for the PV-1000 and PV-2000 are identical, this new Controllers will work on both machines!

I only make a very small batch of these, most likely less than 10 pieces. So if someone is interested in buying one, please contact me via the email address on the first page.